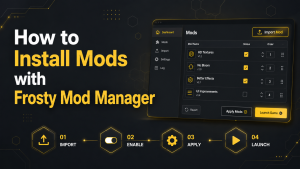
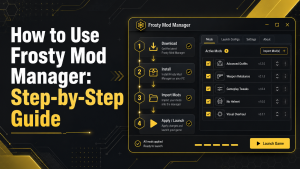
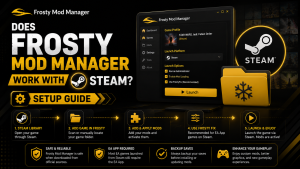
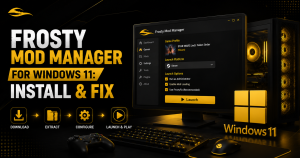
Importing mods into Frosty Mod Manager allows users to add custom content to supported Frostbite games. The process includes selecting the correct game profile, choosing a compatible mod file, activating it, and launching the game through Frosty.
Importing mods into Frosty Mod Manager is the first step toward customizing your favorite Frostbite engine games. Once the manager is installed and configured, you can add compatible mod files, organize them within the application, enable the ones you want to use, and launch your game with the selected modifications applied.
This guide walks you through importing mods into Frosty Mod Manager step by step, including preparing compatible mod files, importing them correctly, managing the load order, and fixing common import errors. Whether you’re adding your first mod or managing a large mod collection, you’ll learn how to do it safely and efficiently.
Understand How Frosty Mod Importing Works
Frosty Mod Manager does not place every mod directly into the original game folder. Instead, it reads the mod file, associates it with the selected game profile, and prepares the required changes when the game launches.
The imported mod first appears in the available mods section. It must then be moved to the applied mods list before it can take effect in the game.
This system helps users manage several mods without manually replacing original game files. It also makes it easier to disable, reorder, or remove mods when needed.
Prepare the Mod File Before Importing
Before importing a mod, check the downloaded package carefully. The file may be ready to use or stored within a compressed archive.
Preparing the file correctly helps Frosty Mod Manager read it without errors. It also prevents users from selecting the wrong document from the downloaded folder.
Check Whether the Mod Is Compressed
Mods are often downloaded as ZIP, RAR, or 7Z archives. Open the downloaded folder and check the file extension before importing it.
If the archive contains a Frosty mod file, extract it with a suitable archive tool. Read the creator’s instructions because some packages may be imported directly, while others must be extracted first.
Find the Required Frosty Mod File
Look for the main mod file inside the downloaded folder. Frosty mods commonly use the .fbmod file format.
Some packages may also include images, text instructions, optional files, or separate add-ons. Select only the file recommended by the mod creator and keep any required supporting files together.
Confirm the Mod Matches Your Game
Before importing a mod, confirm that it was created for the exact game selected in Frosty Mod Manager. Frosty supports games built with the Frostbite engine, but each mod is designed for a particular title and cannot normally be used with another game.
Check the mod page for the supported game version, required downloadable content, dependencies, and Frosty version. As of July 2026, the official releases page still lists Frosty Toolsuite 1.0.6.3, released on September 29, 2023, as the latest stable release.
Follow these checks before importing:
- Confirm that the mod name matches your game.
- Read the latest description and installation instructions.
- Check whether specific downloadable content is required.
- Review the mod’s update date and recent user reports.
- Confirm that the mod supports your current game update.
- Avoid importing files made for another game or mod manager.
A game update can make an older mod incompatible even when Frosty imports it successfully. If the mod page does not confirm current compatibility, back up important files and test the mod separately before combining it with other mods.
Review the Supported Game Version
Check the mod description to confirm which game version it supports. A mod created for an older update may import successfully but fail to work correctly in the current game.
Review the mod’s update date, changelog, and recent user comments. Avoid using the mod when the creator has not confirmed support for your installed game version.
Check Required Dependencies
Some mods need additional files, base mods, downloadable content, or compatibility patches. These requirements are usually listed on the mod download page.
Download and apply all required dependencies before activating the main mod. Missing files can cause loading errors, broken features, or game crashes.
Open the Correct Game Profile in Frosty
Before importing a mod, open Frosty Mod Manager and select the game profile that matches the mod. Each profile is connected to a specific game installation.
Using the wrong profile can cause import errors or prevent the mod from working. Check the game name and installation path before continuing.
If the correct profile does not appear, create a new one by selecting the game’s main executable file. Once the profile opens, Frosty will display the available and applied mod sections.
Add the Mod File to Frosty Mod Manager
After opening the correct profile, use the Import Mod or Add Mods option. Browse to the folder where the downloaded mod is stored and select the compatible Frosty file.
Wait while Frosty reads the package and adds it to the available mods list. Larger mods may take a little longer to process.
Review the imported mod details before applying it. Confirm that the name, version, game, and required files match the information provided by the mod creator.
Browse and Select the Downloaded File
Click Import Mod or Add Mods inside Frosty Mod Manager. Open the folder where the downloaded mod file is saved.
Select the correct Frosty-compatible file, such as an .fbmod file, and click Open. Avoid selecting screenshots, text files, or files created for another mod manager.
Wait for Frosty to Process the Mod
After selecting the file, Frosty will read and import the mod package. The process may take a few seconds, depending on the mod’s size and the computer’s performance.
Do not close Frosty while the file is being processed. When the import is complete, the mod should appear in the available mods list for review and activation.
Check the Imported Mod Information
After Frosty imports the file, review its details before applying it to the game. This step helps confirm that the correct mod was selected and that it matches the active game profile.
Imported information may also show important compatibility notes, required files, and version details. Checking these points can reduce errors before the game is launched.
Review the Mod Name and Description
Select the imported mod from the available mods list. Check that its name matches the mod you downloaded.
Read the description to understand what the mod changes. It may explain new textures, character models, gameplay changes, or other features included in the package.
Do not apply the mod if its name or description appears unrelated to your game.
Confirm the Author, Version, and Requirements
Review the listed author and version to confirm that the file comes from the expected creator. Compare this information with the original download page.
Also check whether the mod requires extra files, downloadable content, base mods, or compatibility patches. Install all required dependencies before activating the main mod.
An outdated version or a missing requirement may cause the mod to fail, create visual issues, or prevent the game from launching correctly.
Activate the Imported Mod
After checking the imported mod information, you must activate it before launching the game. A mod that remains only in the available mods section will not be used by Frosty.
Activation connects the selected mod with the current game profile. It also allows Frosty to include the mod when preparing the game files.
Add the Mod to the Active Panel
Select the imported mod from the available mods list. Click Apply Mod, double-click the mod, or use the available arrow control to move it into the active panel.
If the mod includes several files, apply all required parts. Keep optional files disabled unless you want to use their changes.
Confirm the Mod Is Enabled
Check that the mod appears in the list of applied mods and is marked as active. Some Frosty versions may show a checkbox or enabled status next to the mod.
Review the load order before launching the game. If the mod needs a base file, add-on, or compatibility patch, confirm that each required item is also active.
Import Several Mods at the Same Time
Frosty Mod Manager allows users to import multiple mods into the same game profile. This can save time when setting up a group of related visual, gameplay, or character mods.
Before importing multiple files, confirm that each mod supports the selected game and the current game version. Applying many untested mods at once can make conflicts harder to identify.
Select Multiple Mod Files
Click Import Mod or Add Mods, then open the folder containing the downloaded files. Hold the Ctrl key while selecting separate mod files, or use Shift to select several files in sequence.
Click Open and wait for Frosty to process each file. Review the available mods list to confirm that all selected packages were imported successfully.
Keep Related Mod Files Together
Some mods include a main file, optional add-ons, compatibility patches, or required dependencies. Keep these related files together so they are easier to identify and arrange.
Apply the main mod and its required files in the order recommended by the creator. Give each group a clear place in the load order and avoid mixing unrelated files without testing them first.
Test the Imported Mod in the Game
After activating the mod, test it in-game before adding more files. This helps confirm that the import was successful and makes troubleshooting easier if something goes wrong.
Start with one new mod at a time. Testing several new mods together can make it difficult to identify which file is causing an error.
Launch the Game Through Frosty
Open Frosty Mod Manager and select the correct game profile. Check that the imported mod appears in the applied mods list and is enabled.
Click Launch or Launch Game. Wait while Frosty prepares the modified files and opens the required launcher.
Do not start the game directly from the EA App, Steam, or Epic Games when testing Frosty mods. Launching it normally may prevent the selected mod from loading.
Confirm That the Mod Changes Appear
Open the part of the game affected by the mod. For example, check the relevant character, texture, menu, weapon, or gameplay feature.
If the changes appear correctly and the game remains stable, the mod is working. If nothing changes, review the list of applied mods, compatibility, dependencies, and load order.
Disable other mods temporarily if necessary. This can help confirm whether another file is blocking or replacing the imported mod.
Fix Mod Import Errors
Frosty Mod Manager may sometimes reject a file, fail to show an imported mod, or display an archive-related message. These errors usually occur due to an unsupported format, incomplete extraction, damaged files, or missing dependencies.
Check the downloaded package carefully before importing it again. Use the original mod page to confirm the correct file type and installation instructions.
Unsupported File Format Error
Problem: Frosty cannot import the selected file because it does not recognize the format.
Fix: Extract ZIP, RAR, or 7Z archives when required and look for the main .fbmod file inside. Do not import screenshots, text files, installer files, or packages created for another mod manager.
Download the mod again if the correct Frosty file is missing.
Mod Does Not Appear After Import
Problem: Frosty completes the import, but the mod does not appear in the available mods list.
Fix: Confirm that the correct game profile is open and restart Frosty Mod Manager. Import the file again and wait for the process to finish before clicking elsewhere.
Also, check whether the mod was created for another game or a different Frosty version.
Frosty Shows a Missing Archive Error
Problem: Frosty cannot locate an archive or supporting file required by the imported mod.
Fix: Extract the complete downloaded package and keep all related files together. Do not move, rename, or delete supporting archives before importing the main mod.
If the message continues, download a fresh copy and confirm that all required dependencies are included.
Frequently Asked Questions About Importing Frosty Mods
Importing mods into Frosty Mod Manager is usually simple, but users may still have questions about file types, compatibility, activation, and errors. The following answers explain the most common concerns.
What file format does Frosty Mod Manager support?
Frosty Mod Manager mainly supports files created in the .fbmod format. Some mods may arrive inside ZIP, RAR, or 7Z archives. These archives may need to be extracted before importing. Always follow the instructions provided by the mod creator.
Can I import ZIP files directly into Frosty Mod Manager?
Some Frosty versions may accept compatible ZIP packages directly. However, many downloaded archives contain instructions, images, and optional files rather than a ready-made mod package. Open the archive and look for the required .fbmod file. Extract it first, as the creator recommends.
Why does my imported mod not appear in Frosty?
The mod may not appear if the wrong game profile is open or the file format is unsupported. Restart Frosty and re-import the file. Confirm that the import process completes without errors. You should also check whether the mod supports your selected game.
Do I need to apply a mod after importing it?
Yes, importing and applying are separate steps in Frosty Mod Manager. An imported mod first appears in the available mods section. Move it into the applied mods list to activate it. Confirm that it is enabled before launching the game.
Can I import multiple Frosty mods together?
Yes, Frosty Mod Manager allows users to import several compatible mod files. You can select multiple files during the import process. Apply related dependencies and add-ons with their main mod. Review the load order carefully to prevent conflicts.
Conclusion
Importing mods into Frosty Mod Manager allows users to add custom visuals, characters, interfaces, and gameplay changes to supported Frostbite games. The main process includes preparing the downloaded file, opening the correct game profile, importing the compatible package, and reviewing its information.
After importing the mod, users must add it to the applied mods list and confirm it is active. Required dependencies and compatibility patches should also be enabled before launching the game.
Mod compatibility should be checked carefully because game updates can affect older files. Users should read the creator’s instructions, confirm the supported game version, and test newly imported mods separately.
A careful import process can reduce missing mods, archive errors, crashes, and load order conflicts. By following the correct steps, users can create a more stable and enjoyable modded gaming experience.
Latest Post: