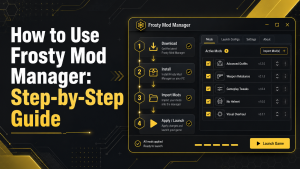
Frosty Mod Manager helps users install, organize, and launch mods for supported Frostbite games. This guide explains how to prepare the manager, connect it to a game, import mod files, apply them correctly, and resolve common installation issues.
Frosty Mod Manager makes installing mods for supported Frostbite engine games quick and straightforward. After setting up the manager, simply import compatible mod files, enable the mods you want to use, arrange their load order if required, and launch the game through Frosty Mod Manager to apply the changes.
This guide explains, step by step, how to install mods with Frosty Mod Manager, from importing your first mod to managing multiple mods and resolving common installation issues. Whether you’re new to modding or an experienced player, you’ll learn how to install and use mods safely for the best gaming experience.
Prepare Frosty Mod Manager for Mod Installation
Before importing mods, make sure Frosty Mod Manager is extracted correctly and linked to a supported game. The game should be fully installed, updated, and opened normally at least once.
Keep Frosty in a separate folder and do not remove any files from it. You should also download mods from trusted sources and confirm that they are compatible with your game version.
Confirm the Game Opens Correctly
Before installing any mods, launch the game normally through the EA App, Steam, or Epic Games. Confirm that it reaches the main menu without crashes, missing files, or update errors.
Close the game before opening Frosty Mod Manager. Testing the original game first helps you identify whether a later problem is caused by Frosty, a mod, or the game installation. Frosty is designed for compatible games that use the Frostbite engine.
Check the Mod File Format
Frosty Mod Manager mainly installs mods provided in the .fbmod format. These files are created through Frosty Editor and contain the assets or settings required to modify a supported game.
If a mod is downloaded as a ZIP or RAR archive, read the creator’s instructions before importing it. Extract the archive when necessary and select the compatible Frosty mod file inside it.
Do not import files created for another mod manager unless the description confirms Frosty compatibility. Using the wrong file type may cause an import error or prevent the mod from working.
Download the Correct Frosty Mod Manager Files
As of July 13, 2026, the latest official stable version is Frosty Toolsuite 1.0.6.3, released on September 29, 2023. The newer Frosty rewrite is still under development and has not yet had a public release, so its official repository still recommends version 1.0.6.3 for stable use.
Follow these steps to download the correct package:
- Open the official CadeEvs/FrostyToolsuite Releases page on GitHub.
- Select Frosty Toolsuite 1.0.6.3.
- Expand the Assets section.
- Download FrostyModManager.zip.
- Do not select FrostyEditor.zip unless you want to create or edit mods.
- Avoid downloading the source code archives because they are intended for developers.
The official Mod Manager package is approximately 79.5 MB. Keep the ZIP file in a secure folder and scan it with Windows Security before extracting it.
Verify the Current Stable Frosty Release
As of July 13, 2026, the official GitHub Releases page lists Frosty Toolsuite 1.0.6.3 as the latest full release. It was published on September 29, 2023, and is not marked as a beta or pre-release.
Before downloading, confirm these details:
- Version number: 1.0.6.3
- Release tag: v1.0.6.3
- Required file: FrostyModManager.zip
- Source: Official CadeEvs FrostyToolsuite GitHub Releases page
Avoid beta packages unless a specific game or mod requires them. The full release is the safer choice for general mod installation.
Choose the Frosty Mod Manager Package
From the release files, select FrostyModManager.zip. This package is designed for users who want to install, organize, and apply mods.
Do not choose FrostyEditor.zip unless you plan to create or edit mods. Source code files are mainly intended for developers.
After downloading the correct package, scan the ZIP file and extract all its contents into a single dedicated folder.
Connect Frosty Mod Manager to the Game
Frosty Mod Manager must be connected to the correct game before mods can be imported or applied. The program creates a separate profile for each supported game.
Open Frosty Mod Manager and select New or Scan for Games. Locate the game’s installation folder and select the main executable file ending in .exe.
After selecting the file, Frosty will create the game profile. Confirm that the correct game name appears before importing any mods.
Locate the Game Installation Folder
The game installation folder contains the main files Frosty needs to create a working game profile. Its location depends on whether the game was installed through the EA App, Steam, or Epic Games.
Follow these steps:
- Open the launcher used to install the game.
- Select the game from your library.
- Open the game properties or management options.
- Choose Browse Local Files or Open Installation Folder.
- Keep the folder open for the next step.
Make sure the game is fully installed and has been launched normally at least once.
Select the Main Game Executable File
Open Frosty Mod Manager and click New or Scan for Games. Browse to the game installation folder you located earlier.
Select the main file ending in .exe, which usually contains the game name. Avoid selecting launcher, setup, or update files.
After selecting the correct executable file, Frosty will create a game profile. Confirm that the correct game name and image appear before importing mods.
Import Mods into Frosty Mod Manager
After creating the correct game profile, you can import compatible mod files into Frosty Mod Manager. Make sure each mod is designed for your game and supports the installed version.
Keep downloaded mods in a separate folder. This makes them easier to find, update, and remove later.
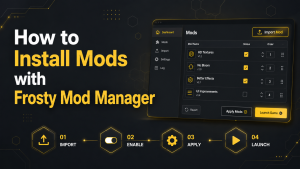
Use the Import Mod Option
Follow these steps to add a mod:
- Open Frosty Mod Manager.
- Select the correct game profile.
- Click Import Mod or Add Mods.
- Browse to the folder containing the downloaded mod.
- Select the compatible mod file.
- Wait for the mod to appear in the available mods list.
Frosty commonly supports .fbmod files and some compatible archives. Read the mod creator’s instructions before importing the file.
Review the Imported Mod Details
Select the imported mod to view its name, version, description, author, and game compatibility information. Check that the details match the game profile you selected.
Also, review any requirements, dependencies, or load order instructions. Do not apply the mod if the information appears incorrect or if the mod was created for another game version.
Apply Mods to the Selected Game Profile
After importing the mod files, you must apply them to the correct game profile. A mod will not work if it remains only in the available mods section.
Check that the selected profile matches the game the mod was created for. Applying a mod to the wrong profile may cause errors or prevent the game from launching.
Move Mods to the Applied Mods List
Follow these steps:
- Select the mod from the available mods list.
- Click Apply Mod or double-click the mod.
- Confirm that it moves to the applied mods panel.
- Repeat the process for any additional mods.
- Arrange the load order if required.
Only mods in the applied mods list will be prepared when the game launches through Frosty.
Confirm the Required Mods Are Active
Review the applied mods panel before starting the game. Make sure all required files, dependencies, and compatibility patches are included.
Check that no important mod is disabled or missing. If a mod requires another file, apply that file as well and place it in the recommended load order.
Arrange the Frosty Mod Load Order
The mod load order decides which mod receives priority when two or more mods change the same game files. A correct order can prevent missing textures, broken features, crashes, and other compatibility problems.
Read the instructions provided by each mod creator before changing the order. Some mods, add-ons, and compatibility patches must be placed in a specific position.
Set Mod Priority
Use the up and down controls in the applied mods list to reorder them.
Follow these basic steps:
- Keep required base mods in their recommended position.
- Place add-ons close to their main mod.
- Add compatibility patches where the creator recommends.
- Give higher priority to the mod whose changes you want to appear.
- Launch the game and test the final result.
Avoid changing the order at random, as this may prevent a mod from working correctly.
Check for Mod Conflicts
A conflict occurs when two or more mods edit the same content. Common signs include crashes, missing textures, incorrect menus, or changes that do not appear in the game.
Disable suspected mods one at a time and launch the game again. When the problem disappears, the last disabled module is likely causing the conflict.
You can then change its priority, update it, replace it, or remove it from the list of applied mods.
Launch the Game with Frosty Mods
After applying the required mods, check the list of applied mods and confirm the load order is correct. Close the game before starting it through Frosty Mod Manager.
Follow these steps:
- Open Frosty Mod Manager as an administrator.
- Select the correct game profile.
- Confirm that all required mods are active.
- Click Launch or Launch Game.
- Wait while Frosty prepares the modified files.
- Allow the EA App, Steam, or Epic Games launcher to open.
Always launch the game through Frosty when you want to use the selected mods. Starting the game directly may prevent them from loading.
Disable or Remove Frosty Mods
You can disable a mod temporarily without deleting its original file. This is helpful when testing conflicts or returning the game to its normal state.
Follow these steps:
- Open the correct game profile.
- Find the mod in the applied mods list.
- Select it and click Remove Mod.
- Confirm that it returns to the available mods list.
- Delete the imported mod only when you no longer need it.
Disable mods one at a time during troubleshooting. This makes it easier to identify the file causing a problem.
Common Frosty Mod Installation Problems and Fixes
Frosty mods may fail because of incorrect game paths, unsupported files, permission issues, or mod conflicts. Most problems can be fixed by carefully checking the setup.
Problem: Mods Do Not Appear in the Game
Fix: Confirm that the mods are in the applied mods list. Check their compatibility and launch the game through Frosty Mod Manager.
Problem: Game Does Not Launch Through Frosty
Fix: Run Frosty as an administrator, then open the required game launcher. Disable recently added mods if the problem continues.
Problem: Mod File Cannot Be Imported
Fix: Check that the file uses a supported Frosty format. Extract compressed archives when required and select the correct mod file.
Problem: Game Crashes After Adding Mods
Fix: Disable mods one at a time to identify the conflict. Update, reorder, or remove the mod causing the crash.
Frequently Asked Questions About Installing Frosty Mods
Installing Frosty mods is usually simple, but users may still have questions about file formats, launching the game, compatibility, and removal. The answers below explain the most common concerns.
Do I need to launch the game through Frosty Mod Manager?
Yes, you should normally launch the game through Frosty Mod Manager when using applied mods. Frosty prepares the modified files before opening the game.
Launching the game directly from the EA App, Steam, or Epic Games may prevent the selected mods from loading.
What mod files can Frosty Mod Manager import?
Frosty Mod Manager mainly supports compatible .fbmod files. Some mods may also be provided inside ZIP or RAR archives.
Read the mod creator’s instructions before importing the file. First, extract the archive, then extract the compatible mod file from it.
Why aren’t my installed mods showing up?
Mods may not appear if they are still on the available mods list, are disabled, are outdated, or are incompatible with the current game version.
Move the mods to the applied mods list, check their load order, and launch the game through Frosty Mod Manager.
Can I install several Frosty mods together?
Yes, Frosty Mod Manager allows users to apply multiple mods to the same game profile. However, some mods may edit the same game files, creating conflicts.
Check the recommended load order and test new mods one at a time. This makes it easier to identify any problem.
Conclusion
Frosty Mod Manager provides a practical way to import, organize, apply, and remove mods in supported Frostbite games. The installation process includes selecting the correct game profile, importing compatible files, arranging the load order, and launching the game through Frosty.
For better results, users should download mods from trusted sources and verify their compatibility with their game before applying them. Testing mods individually can also reduce crashes, missing content, and load order conflicts.
By following the correct steps, users can create a more stable and enjoyable modded gaming experience.
Latest Post: